Friday, November 8, 2024
Building your own wooden clock: tips and tricks

Hey there, crafty folks! Ever dreamt of having a unique, handcrafted clock on your wall? Well, ditch those mass-produced tickers and let's build one ourselves! This isn't just about telling time, it's about creating something personal, something you can be proud of.
Let's Get Started: The Essential Ingredients
First things first, gather your tools and materials. This isn't rocket science, but you'll need a few basics:
Wood: This is the heart of your clock, so choose wisely! Plywood, MDF, reclaimed wood, even that old pallet you've been eyeing - the possibilities are endless.
Clock Mechanism: The brains of the operation! You can find these online, and they come in different sizes and styles. Choose one that matches the look you're going for.
Hands: These are the actors, conveying the passage of time. Opt for hands that complement the clock face and your overall design.
Saw: For cutting the wood, a jigsaw or a handsaw will do the trick.
Sandpaper: Smooth those rough edges and give your clock a polished look.
Wood Glue: For a strong bond, a good quality wood glue is essential.
Finishing Supplies: This is where your creativity shines! Paint, stain, varnish, or even decoupage - choose your weapon!
Measuring Tape, Pencil, Drill: Your trusty companions for precision and assembly.
Designing Your Masterpiece: From Blank Slate to Timekeeper
Now, let's get creative! You can find inspiration everywhere, from vintage clocks to abstract designs. Here are a few ideas to spark your imagination:
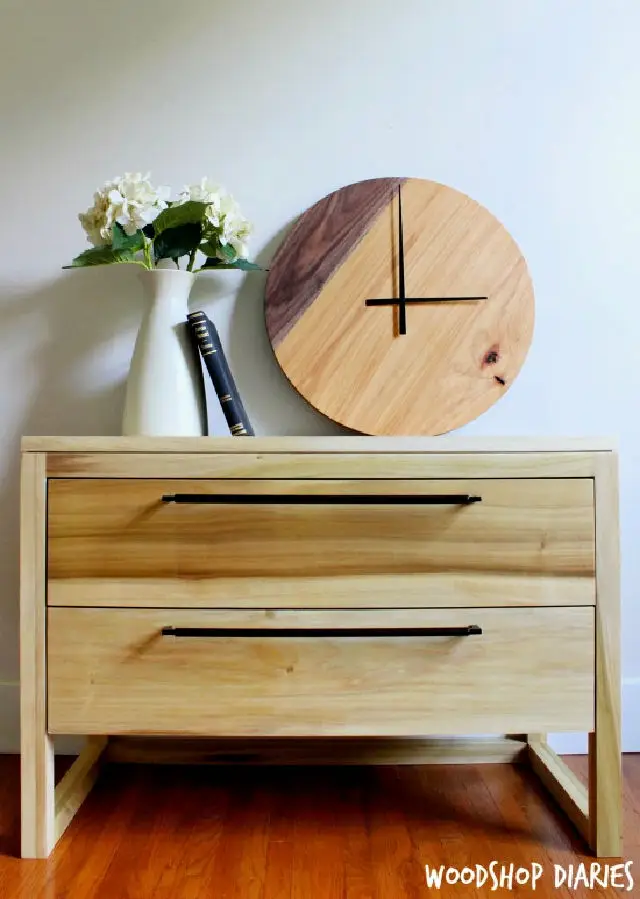
Geometric Wonders: Clean lines and shapes for a minimalist look.
Rustic Charm: Embrace the imperfections of wood with knots and grain patterns.
Nature's Embrace: Incorporate leaves, branches, or even pressed flowers for a touch of whimsy.
Personalized Touches: Engraved initials, family crests, or a meaningful quote - make it truly yours!
Building the Base: A Foundation of Precision
Once you've sketched out your design, it's time to bring it to life. Cut the wood according to your measurements. Remember, accurate measurements are crucial for a balanced and functional clock.
Tips and Tricks for the Build:
Plan your cuts: Draw out your design on the wood, using a pencil and ruler for accuracy.
Sanding is key: Sand the edges and surfaces of your clock face, ensuring a smooth, polished finish.
Drill pilot holes: To prevent wood from splitting, drill pilot holes for screws before attaching the clock mechanism.
Test fit: Before attaching everything permanently, try fitting the mechanism and hands to ensure everything aligns perfectly.
Glue and clamp: For a strong, durable bond, apply wood glue to the joints and clamp them securely until the glue dries.
Finishing Touches: The Moment of Truth
Now comes the exciting part - dressing up your masterpiece!
Paint it up: Choose colors that match your style.
Staining for a natural look: Enhance the wood's grain with different shades of stain.
Add some texture: Use sandpaper, brushes, or stencils to create a unique look.
Accessorize with flair: Add embellishments like beads, buttons, or even small figurines to personalize your clock.
Time to Tick: Installing the Mechanism
Once the clock face is ready, it's time to install the mechanism. This is the part that brings your creation to life!
Centering the mechanism: Position the mechanism carefully in the center of your clock face.
Secure it firmly: Attach the mechanism using the screws provided or by drilling pilot holes and using wood screws.
Attaching the hands: Attach the hands to the mechanism in the correct order - hour, minute, and second.
Testing the time: Turn the clock mechanism to set the time and make sure everything works smoothly.
Showcasing Your Creation:
Congratulations! You've built a stunning, one-of-a-kind clock. Now it's time to display your masterpiece!
Find the perfect spot: Choose a wall where your clock will be showcased beautifully.
Hang it securely: Use a strong hook or nail to hang your clock securely on the wall.
Add a personal touch: Display it alongside other decorative items that complement your clock's style.
Beyond the Basics: Exploring Advanced Techniques
Ready to take your clock-making to the next level? Here are a few advanced techniques to try:
Wood Burning: Add intricate designs and details using a wood-burning tool.
Carving: Transform your clock with intricate carvings, adding depth and dimension.
Inlay: Create beautiful patterns by embedding different materials like wood, metal, or gemstones into the surface of the clock.
Intarsia: Build up your clock face by assembling pieces of wood with different colors and patterns.
The Joy of Building
Making your own wooden clock is a journey of discovery, a testament to your creativity. It's a rewarding process, one that allows you to leave your personal mark on every tick and tock.
So, gather your materials, unleash your imagination, and start building! Who knows, you might just discover a hidden talent for clock-making along the way.